I made these curtains for a home that we owned in Hot Springs, AR. We were baling on a budget! We have since sold it, but I am going to share some of the projects that I did while there. Sometimes, I miss it! I don’t miss the extra maintenance or the drive! We recently visited Hot Springs and did a drive by the house. It looked good!
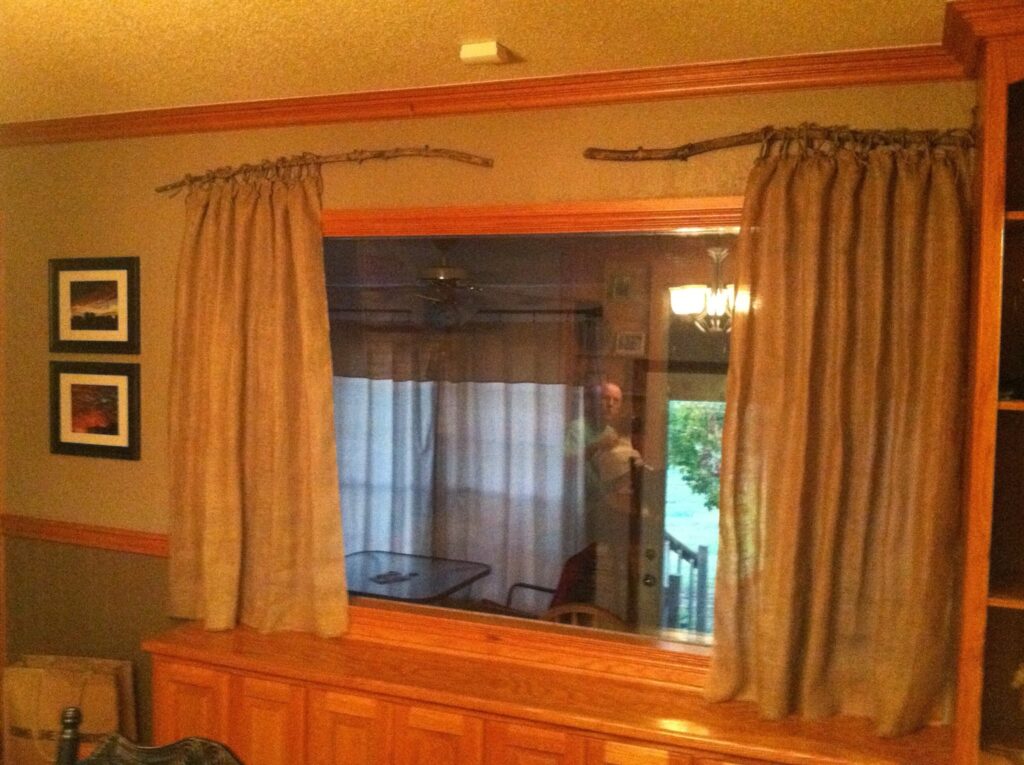
I loved that Dining room with the fireplace, but that huge window needed curtains! I am sure the view was lovely when it didn’t include the sunroom and door. Curtain are expensive and burlap was all the rage. Burlap is also pretty inexpensive. I had seen many pictures of burlap curtains, but no real instructions. I am going to show you how I made mine.
I want to apologize for the low quality pictures. I got several with my camera, before it said, “Batteries are Exhausted,” Really….thank goodness for phones.

This is the window with the lovely view. Also, pictured is my Craigs List find, table with 6 chairs, for $175. Yes, I painted the chairs. They were a mess.
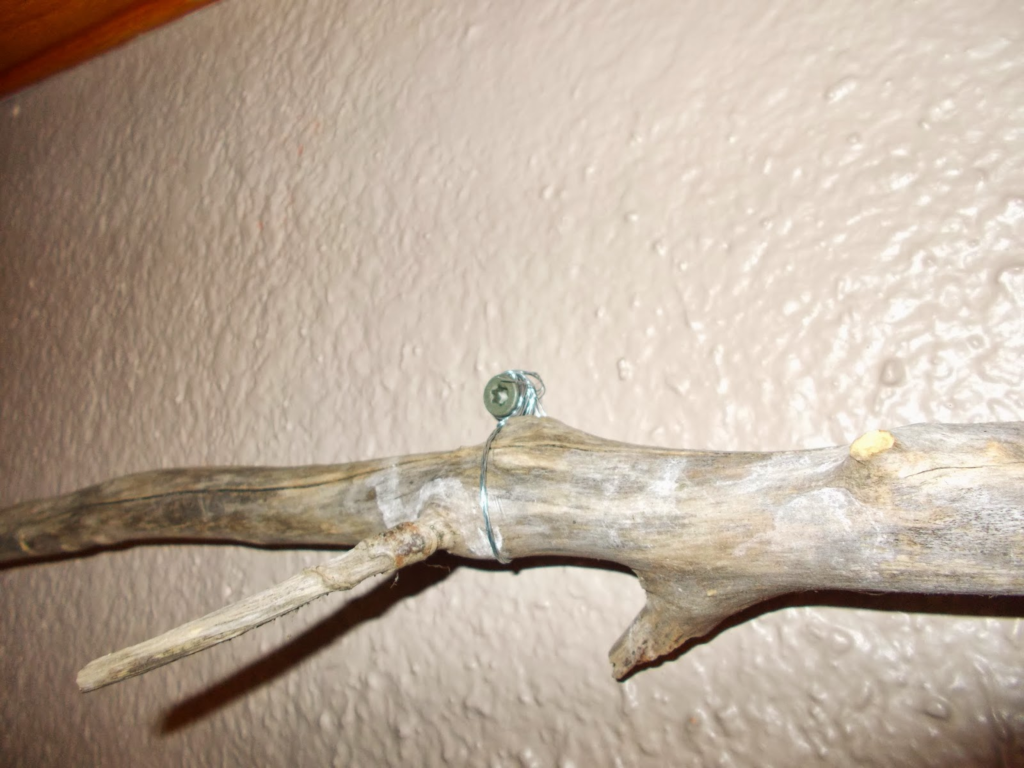
I have seen pictures with curtains on branches, and on different types of rods. I decided to go branch hunting. I found the Perfect Branch, the perfect length….Until I broke off the small end…Sanding on it. So, the next best thing. I cut it and left a gap between the two sides.
Now, for the curtains….Easy Peesy…If, I can do it, anyone can!

Ok, this picture, is showing something else, BUT do you see the string, that I am pulling? Burlap DOES NOT cut straight. So, when you measure out the length that you need, pull one of the strings, completely out and then make your cut in the gap left. A lady at Walmart taught me this….
Measure the length of the curtain needed for your window. I feel that they look better hung higher as shown in my photo. Hanging the curtain higher on the wall also makes your window appear larger. Add a half of inch for your seam at the top. I used 3/8″ Heat Bond to hem. Click https://amzn.to/42a7Z1I to see what I used. Place the heat bond on your fabric. Fold over the desired width and Iron.

Then I could not decide how I would attach the curtains. I fly by the seat of my pants a lot and I ride a broom according to others….
I decided to use a Jute twine. It can be found in the Hardware store, on the aisle with ropes, chains, etc. It comes in different sizes. This is not the smallest and not the largest. Or you can purchase from Amazon. Here is a link https://amzn.to/3mT0iNg

I cut my twine 20″, so I would have enough to tie. Find the center point of the twine 10″ and sew to the corner of fabric and then I placed one every 7 1/4″. Click https://amzn.to/42a7Z1I to see the twine that I used.
For a less rustic look, go with a traditional curtain rod and use clip-on curtain hangers. Like these https://amzn.to/40pazPTe
Now, back to this picture. I wanted my curtains puckered at the top. Some of the pictures that I have seen of burlap curtains just don’t look like they hang well. So, I picked a string near the top of curtain and pulled, (be careful or you can pull it all the way out) Pull string and work your fabric into a pucker. You can locate the string on the other end, and pucker your fabric from that end as well. I then tied several knots in the string and cut off the excess.

Tie them on your stick. Some of twine will be longer than others, unless you find a stick that is straight as arrow…I haven’t decided about what I want to do with extra, leave it, cut it off, fray the ends….What do you think? Let me know.

After, I had them tied up, the curtains wanted to flair out. I worked on my pleats and tied them back for awhile. Burlap is stiff!

Finished!
I have found that one project always leads to another. I have so many in my head, I just can’t get to them all. But, I want to do a Stained glass window to hang in the middle…to hide that wonderful view of the sunroom door. I did do a Stained Glass window to hang there and now that we sold the home, it has a new home here. I will be updating and adding content, so please check back often.
Don’t be a LURKER……Please leave a comment that you have visited. Or any questions that I might can help you with……
Any links on my page my lead to me being paid a commission for sharing a place to purchase a product.
Love the idea for curtain rods!!
Thanks so much for reading! I will be adding more content.
Love this!
Thanks Cuz! Check back for more! I am really working on this! Trying to get the blog set up and it has been a learning experience. The other one that I have was easy to use.