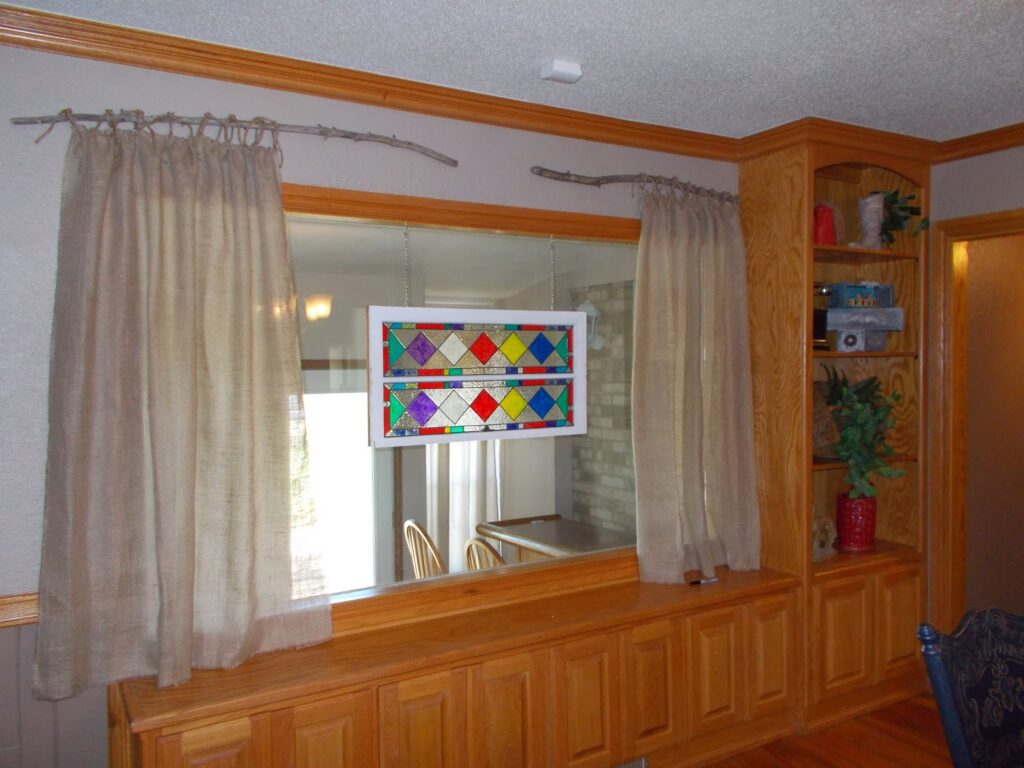
The Hot Springs house had a huge plate glass window in the Dining Room that had a Great view of……the Sunroom and a Door. I had made some Burlap curtains for this window, which helped to soften it a bit, but it still needed something. Now, the door was a focal point when looking out. Honestly, I didn’t look out, because there is nothing to look at, but the window lets in a lot of light. I had seen the Faux Stained-Glass windows and I thought maybe that is what I needed. What do you think?
This was a fun project! I didn’t read or look at any tutorials, just the instructions on the box. If, you want to make one for yourself, keep reading and I will show the process.
What you need:
1. A window. I paid $10 for mine.
2. Gallery Glass Instant Lead Lines, you can get this in a roll too.
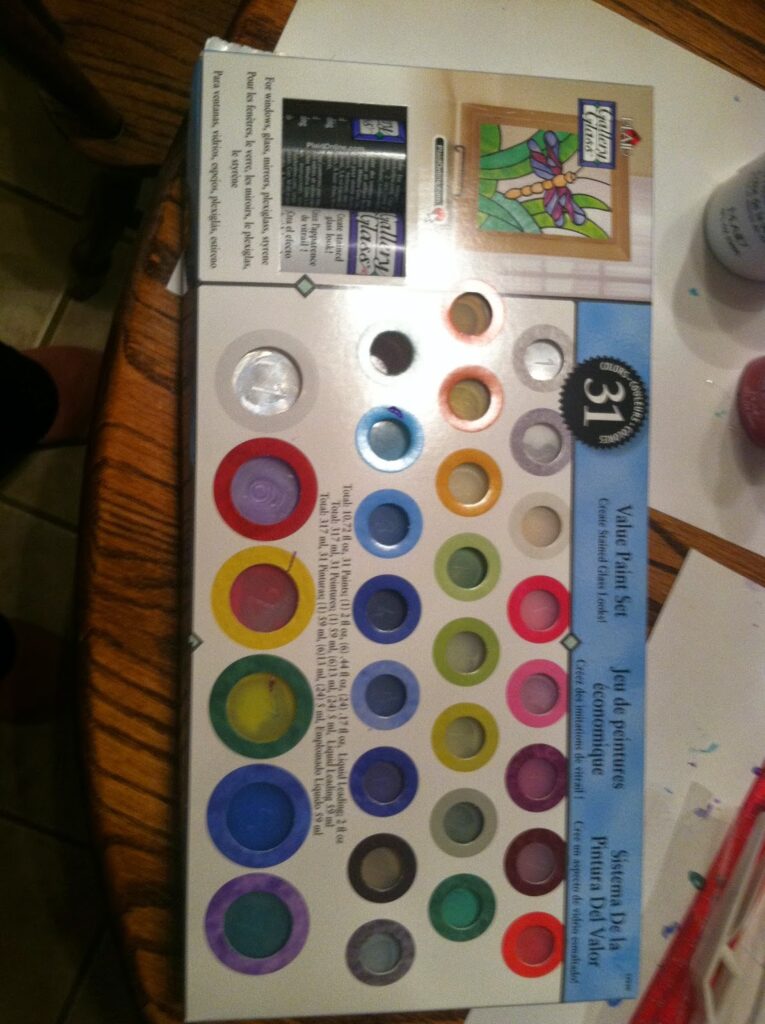
3. Gallery Glass Paint, so many colors available!
I bought this sample pack, that provided many colors, but later purchased the paint bottles.
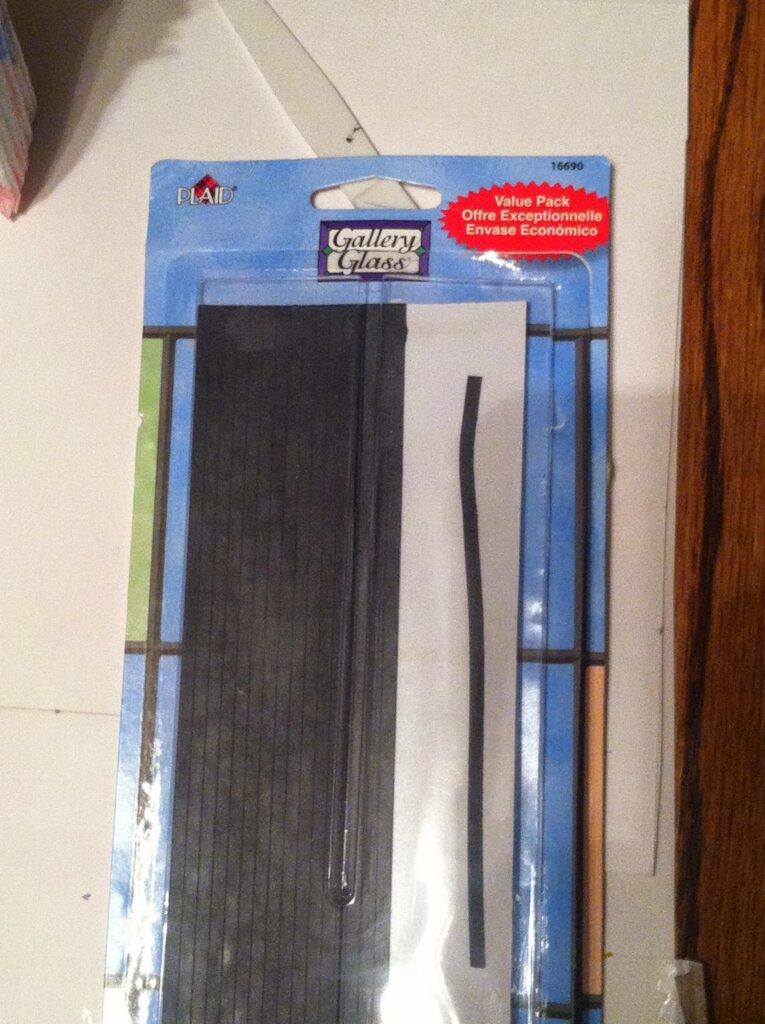
4. Craft Knife- like this one.
5. Toothpicks
6. A pattern printed off the internet or make your own.
Now, you’re ready!
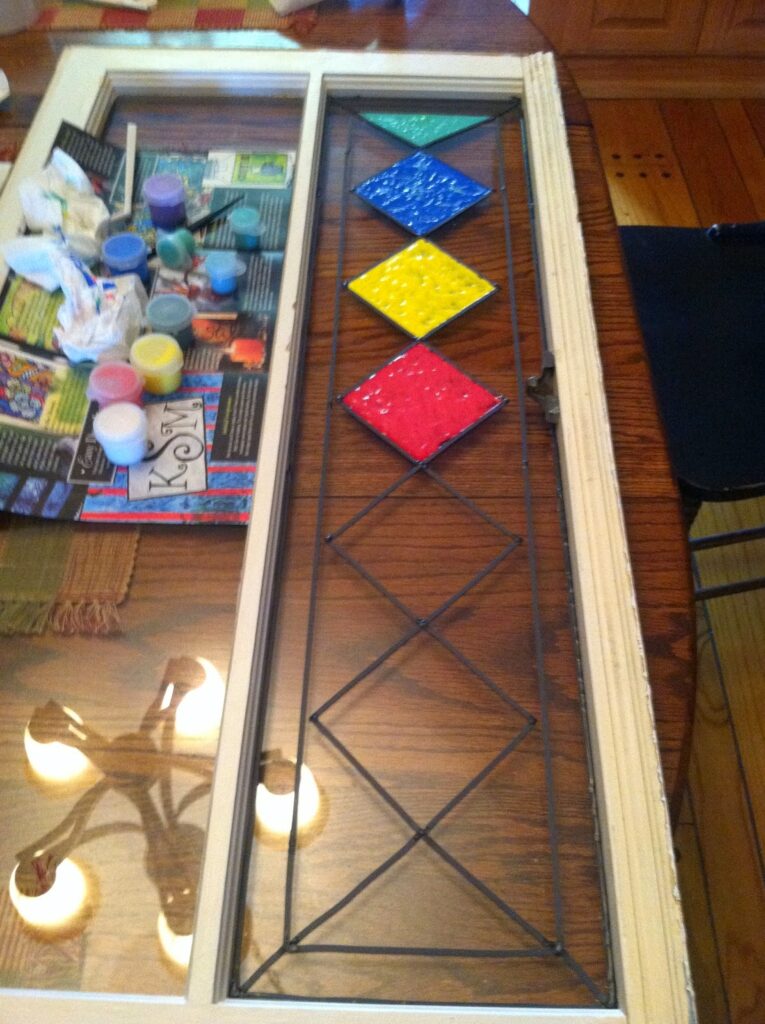
First, I decided on a pattern. I measured my window opening and then drew it out on poster board. I cut the board and taped it to the back of the window in order to lay out my lead lines. Sorry, I didn’t take a picture. I decided to do one side first and see how it worked out.
2. Thoroughly clean window with glass cleaner before starting your project
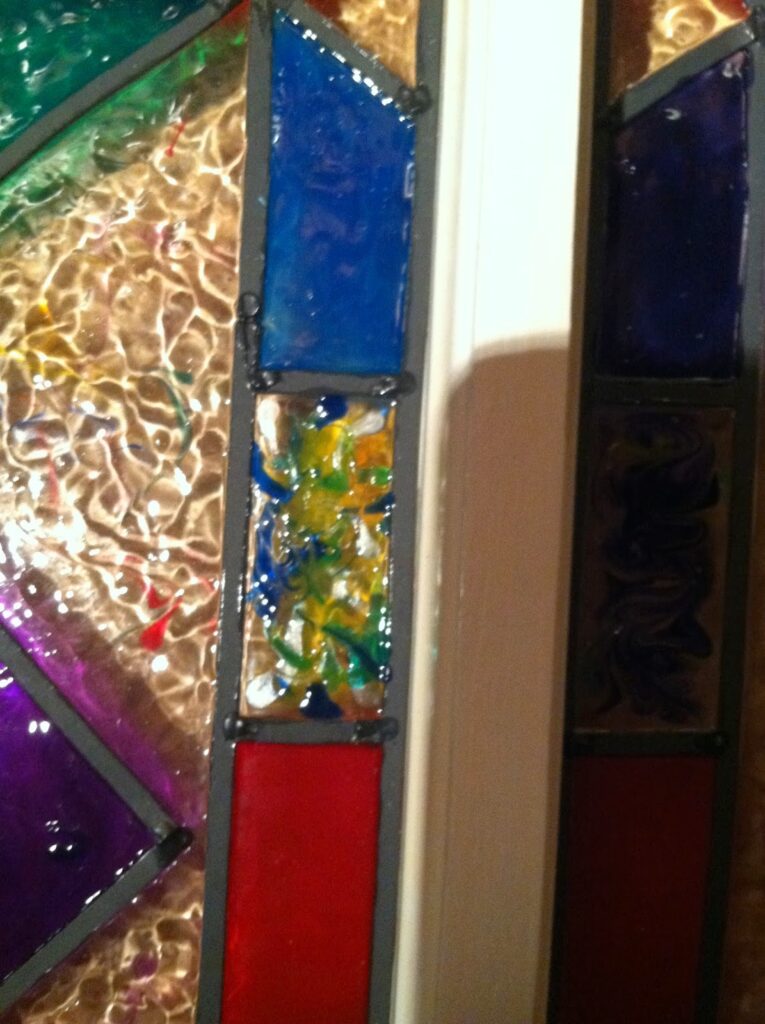
3. Apply the lead lines to your pattern. Be careful not to stretch. If the line doesn’t exactly lay down where you want it, just push it into place and push line down firmly. Instructions say NOT to overlap, but I saw a tutorial where a lady did overlap hers. I did not and used a craft knife to trim. Then use your Liquid Line Leading to solder the intersections. Let it dry completely before painting. I let mine set over night.
The painting begins! HINT*****Do this project in an area with a lot of light! This paint bubbles, take a toothpick to pop. They are hard to see!
Using the tip of the Paint bottle, (The bottles are the way to go, Ease of use and cost) gently squeeze paint around the inside perimeter of the leaded design, filling as high as the lead and then fill in the center. Use a small tool or toothpick to comb back and forth to pop bubbles and make sure the paint is up against the edge. The paint will shrink, so if you don’t have it against the edge, you will see the gap. ****Ok I hated one of the colors I used. So, after it dried, I took a sharp craft knife and cut really close around the edge and peeled up the paint. Yep, it dries like plastic!
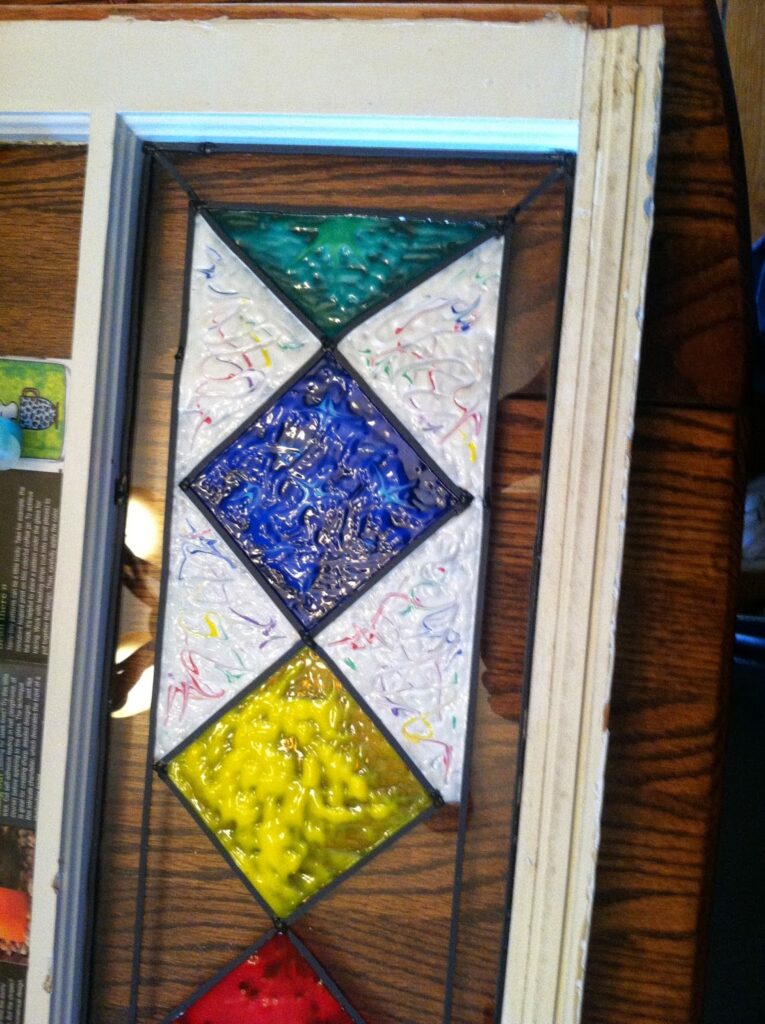
You can make designs in the paint. I patted the paint with a craft spoon to make the paint have a texture, instead of smooth. The white will turn clear, but I used a small, pointed tool and dipped into different colors and then swirled thru the white. Wipe your point off after each color. Do not rush drying by adding a fan, etc. I decided I needed to break up the boarder by adding more lead line. You never see just solid border in Stained Glass
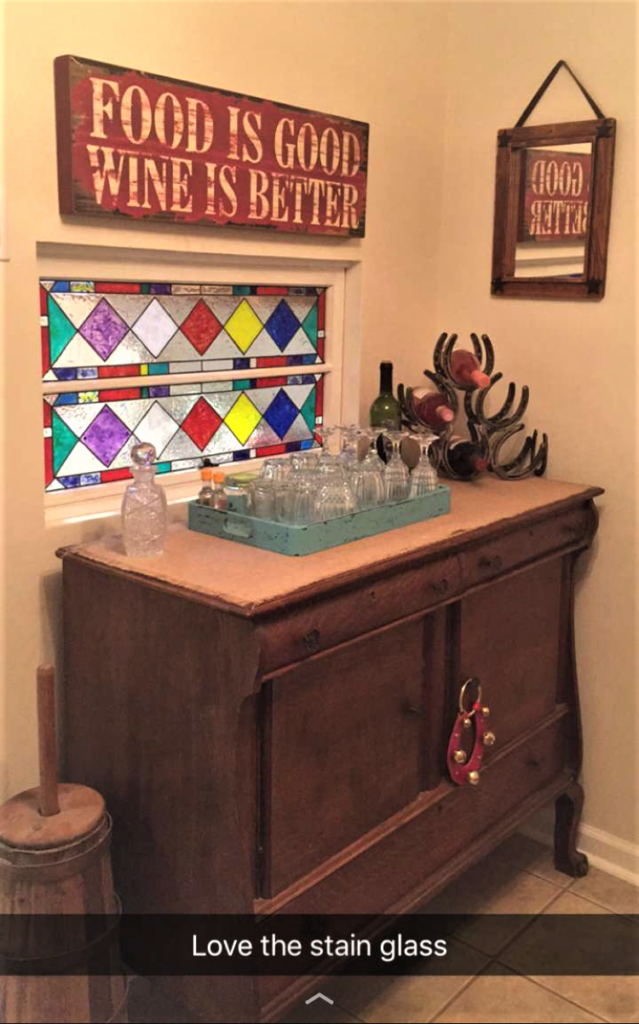
This was a really fun project! It added something to that big window with an ugly view. When we sold the house, I found a new place for it in our home.
As always thanks for dropping in. If you have any questions, please reach out and I will try to answer.
I also have another blog Simple, But Fabulous (simplebutfabulous.blogspot.com) Drop over there for older content.
PS: Please give me a follow-on Melinda Donnell’s Amazon Page, where I post videos with honest reviews on products that we have purchased. As an Amazon Affiliate, I may receive a small commission for sharing links on the products discussed, at no extra charge to you. Have FUN! Enjoy LIFE!