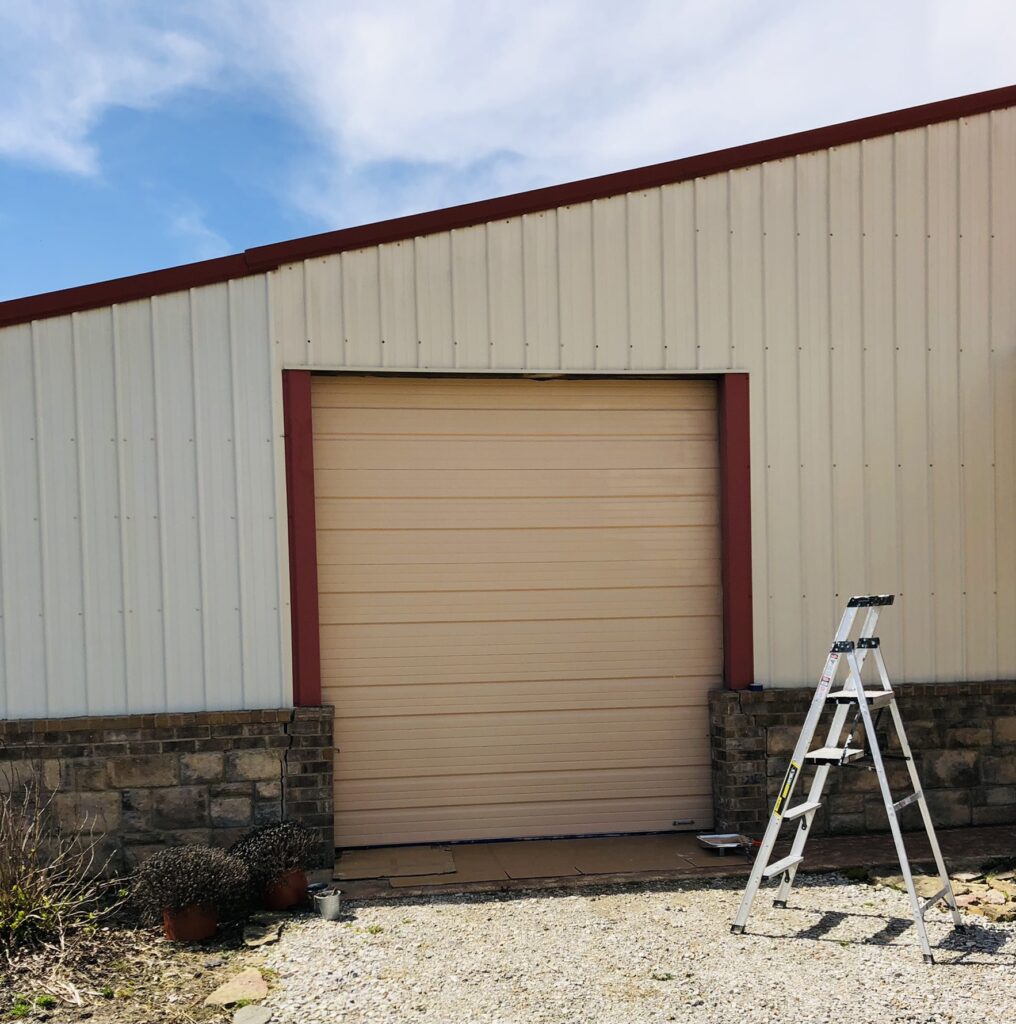
I was really tired of the white commercial doors that were on our home. We had done another renovation on a vacation home in Hot Springs and had put craftsman doors on the barn that we renovated. I wanted craftsman doors on our house, but when we checked the prices, we had sticker shock. The door prices had skyrocketed! Our doors were functionable and nothing wrong with them. I remembered seeing someone using gel stain on doors. My motto is, it is just paint, if you don’t like it, paint over it! And, FYI, we were still on the fence about painting the whole barn, so we went about this a little backwards. After painting the doors, we decided the whole barn had to be painted. A big deciding point on that was, that my brother would come in town and paint for me!
First, with any project, clean what you are painting. We used dawn liquid detergent and scrubbed the doors down and rinsed well.
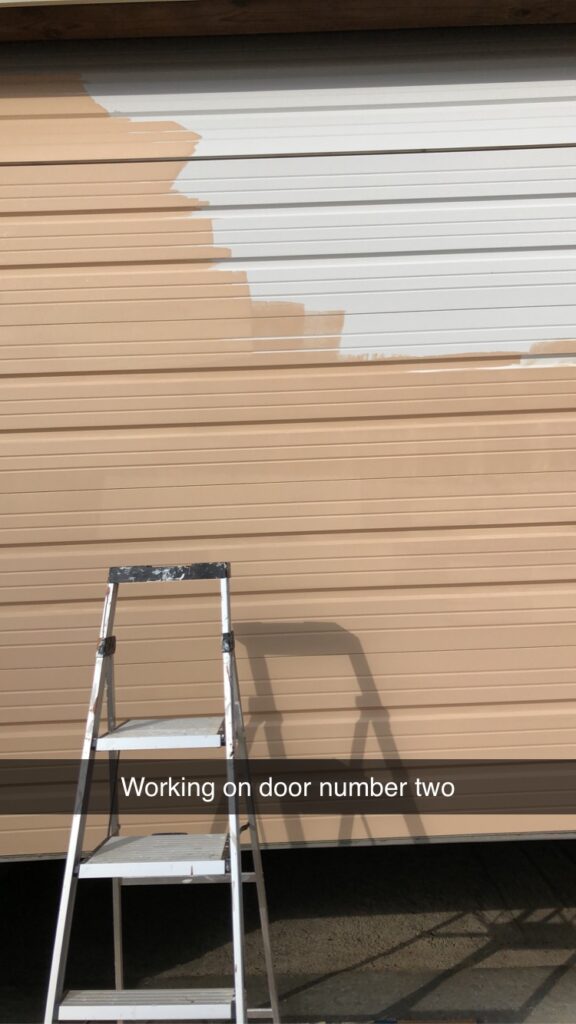
Second, pick out a base coat. I didn’t spend any time on this, I just went with a beige color. It is just going to be in the background. Honestly, I have no idea what the gel stain would look like painted on white. I used a paint roller and a brush.
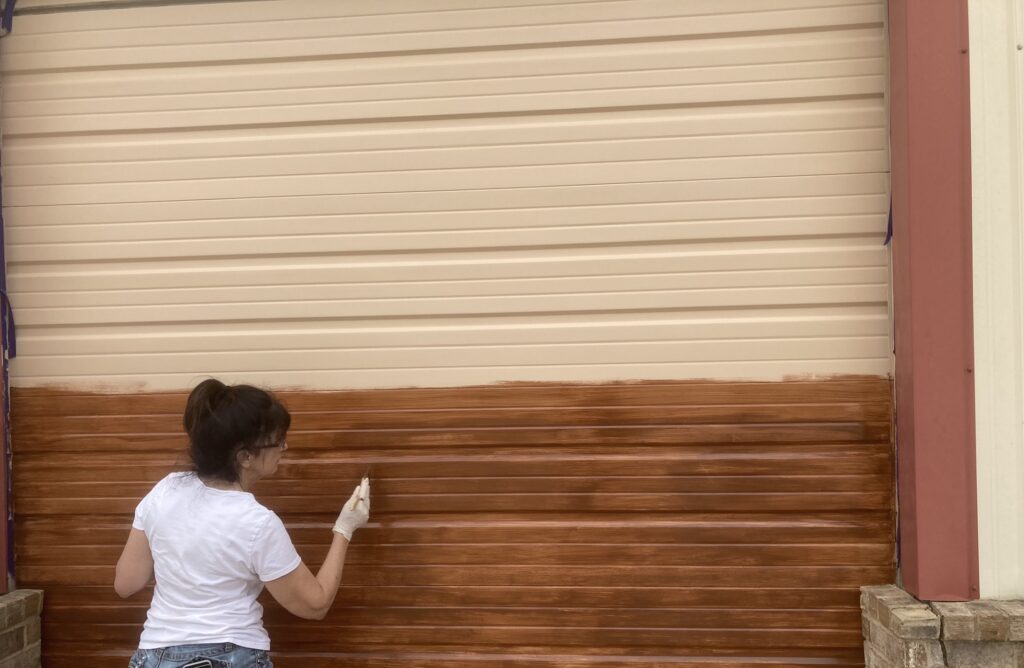
Gel stain is movable for a few minutes. I used a stiff brush, as I wanted lines, lighter areas, and darker areas, so it would appear like wood.
Work a small area at a time and move on. If you mess with it while it is drying, the stain will start pulling up. This can also be a good thing. If you notice you have a really dark area that needs to be lightened, put some stain on that area and move it around.
You will or I did, have areas that were lighter and darker. Trust the process. You can see in the picture some of those areas.
Let it dry overnight. The next day, add gel to areas that need to be darker.
TIP: Try to work in the shade or cool part of the day
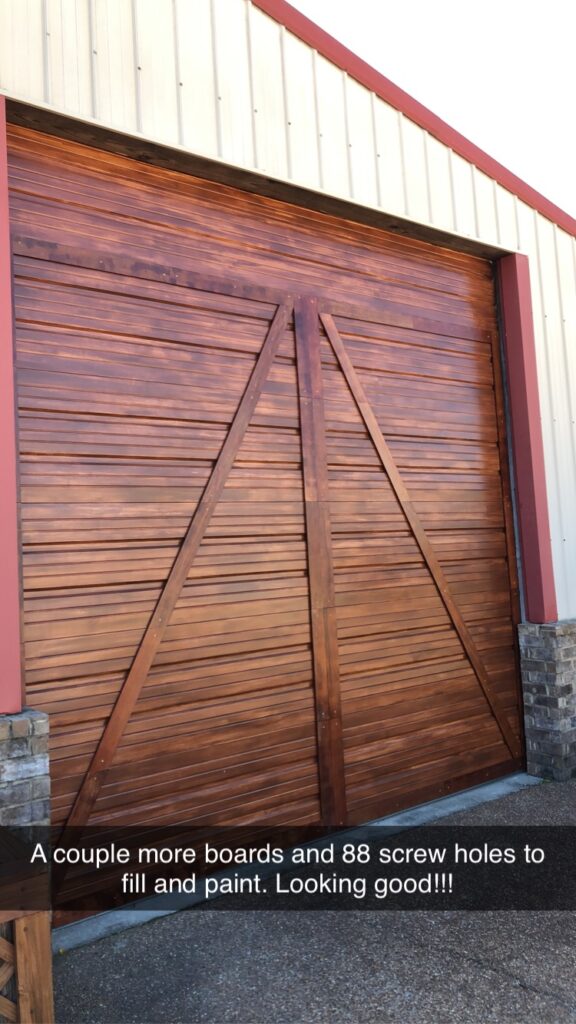
We were worried about how much weight the boards would add to the door, as it can cause an issue with the ease of opening the door. We had to have the big door motor replaced, because it was shot anyway, but while the garage door man was here, he adjusted all the springs on all the doors because of the added weight.
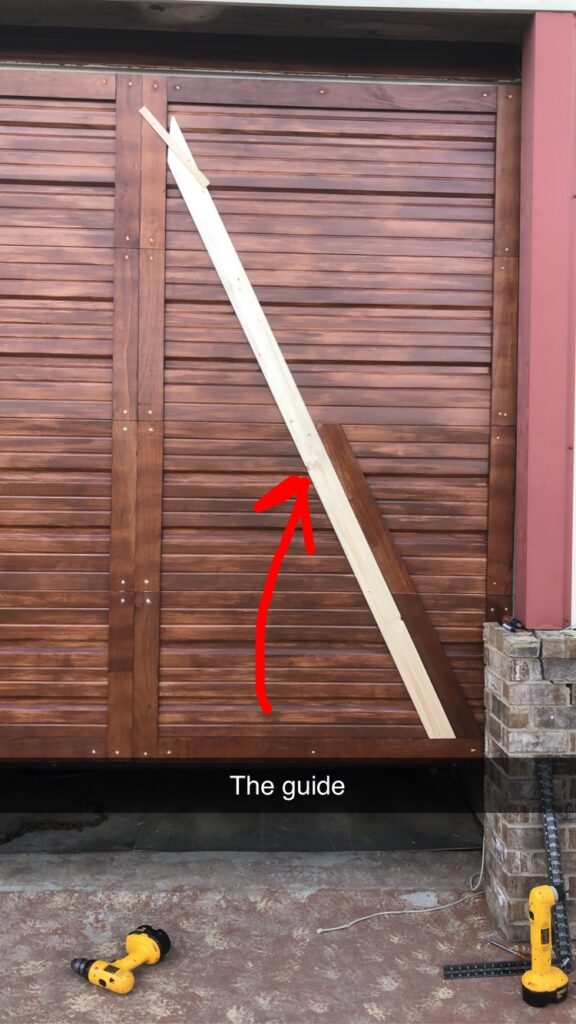
Bob found a board at Lowes, called a Hobby Board. It is already precut to 3′ and 4′ pieces, and only 1/2 thick x 4″. This project took a lot of pieces! It required runs to different Lowes several times.
Bob used an exterior deck stain and polyurethane on both sides of the boards.
First, He placed the guide board in the middle of where one row of boards would go up, using the board for a straight-line guide. The boards were attached with Liquid Nails and screws.
Second, place top board and bottom row.
Third, he placed the guide where he needed for the angle. This allowed him to figure the angle that needed to be cut and gave him support while attaching the boards.
Fourth, fill all holes with wood putty and stain.
Painting and staining the doors was the fast part. These boards were time very time consuming. Bob did a great job!
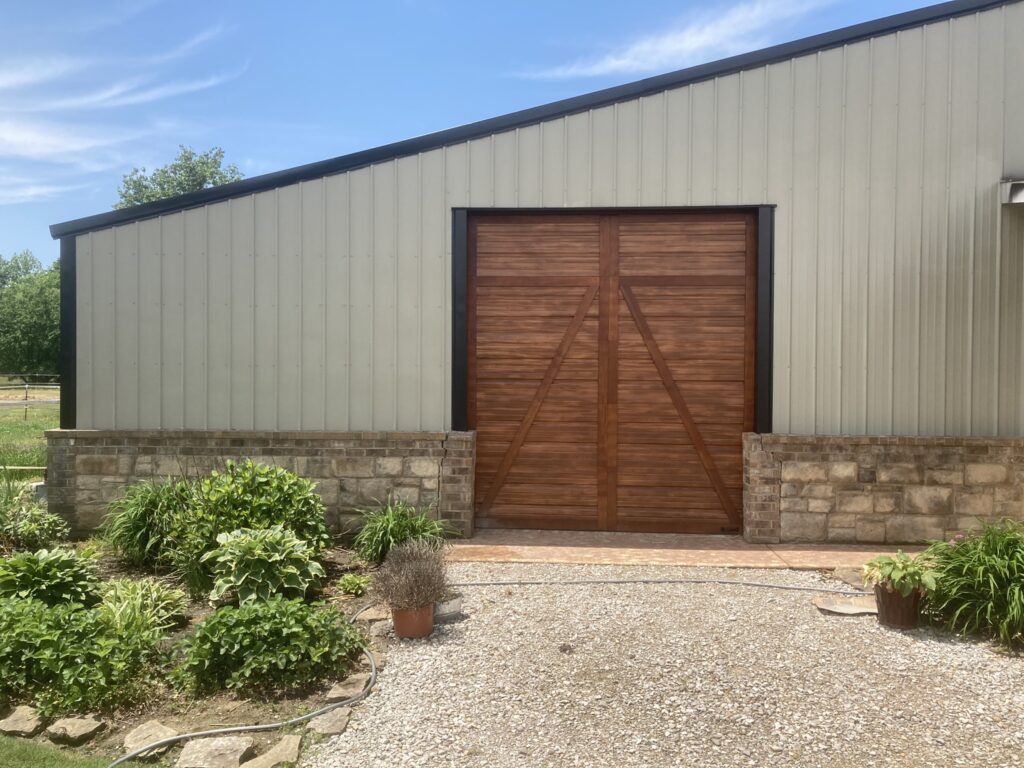
We love them! In writing this, it has been about 2 years to the day since we did this project and they have held up beautifully!
Supplies that I used to paint the garage doors to look like wood:
1 gallon – Valspar Exterior paint – Beige, Rollers and paint brush.
Minwax gel stain- can be purchased here- https://amzn.to/43VIQbU
A stiff paint brush that is disposable. This is one that I used https://amzn.to/40zIIw3
As always, Thanks for stopping by. I hope we may have inspired you to start you own project!
Don’t be a lurker, leave a comment or if you have questions, ask.
PS: Please follow me on Melinda Donnell’s Amazon Page where I place videos of honest reviews on products that we have purchased. As an Amazon affiliate, I may earn a small commission on a qualified sale at no extra charge to you.